What is Content Dripping?
If you read my post on membership plugins, or on creating an e-learning course in WordPress, then you probably read about “content dripping.” But maybe, like some of the folks that emailed me directly after those posts, you had no idea what content dripping was. So let me tell you what it is and why it's important – before I walk you through how to do it.
Content Dripping is the delivery of content over time – in a pre-scheduled manner.
Why would you want to drip content?
But if that definition doesn't seem to capture the essence of what I'm talking about, let me explain why it's important. Imagine you create amazing and fantastic content for an online course or program. Imagine you've created nine lessons that you want people to move thru over 3 months. You want to charge them $200/month and expect that you'll get a total of $600 for the total course (since it takes people 3 months to complete). But you also create a money-back guarantee because you heard that helps close deals online.
So you put up your landing page and start collecting money. Yeah! But then, days later, you start getting refund requests. Maybe it's your sales page. Maybe it's your content. You start wondering what to fix. But the truth is something different entirely.
People are signing up, logging in, downloading all your content, and then asking for their money back – because it's easy to do.
And that's why delivering content on a pre-defined schedule over time becomes critical. That way, you can roll out one lesson a week, over the three months. But how do you do it in WordPress? Glad you asked!
Premise does more than Landing Pages
You can't have spent much time on this blog without learning that I really enjoy the stuff that the CopyBlogger folks put out – from StudioPress WordPress themes, to plugins like Scribe & Premise. In fact, Premise was the first plugin I integrated with when I was building my PURL plugin, ElegantPURL. So you likely know that Premise is fantastic for landing pages. But guess what? It does more. Recently they added features for membership and I didn't include it in the other comparison because I wanted to walk you thru it on its own.
Getting Started with Premise: Activating the Membership Component
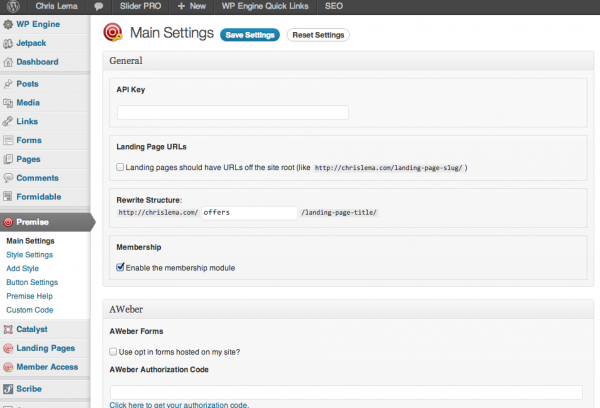
When you activate Premise, you'll see both “Premise” and “Landing Pages” in your left navigation. But you won't see “Member Access.” So how do you get the menu option there? Easy. Go into Premise > Main Settings and click the check box in the Membership area that says, “Enable the membership modules.” That will add the Member Access menu on the left, and that's when the real fun starts.
Step Two: Creating a Product
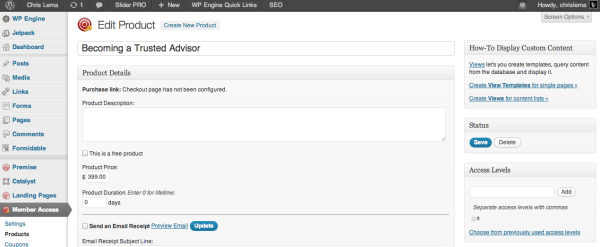
Under Member Access, look for Products to create your new membership product. These can be a free, a one-time charge, or a recurring charge product. Whatever you choose, you'll need to give the membership product a title, a description, a price and most importantly, on the right, an access level. If you've already created other courses, you may re-use pre-existing access levels, but if not, you'll want to add one. Everything is based on that access level, so make sure you create it as part of the product if this is your first product.
Step Three: Create that Content
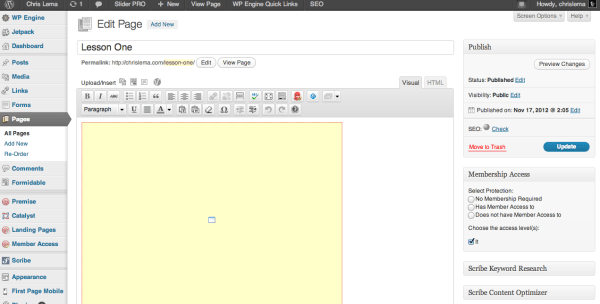
I like to use Vimeo because it allows me to protect my videos from being embedded or accessed elsewhere, but that's another post. What you'll notice here however, is that it's incredibly simple to create course content. You title a post or page (in this case I'm using pages), tell Premise that it requires membership to access the page, mark which access level it's associated with, and then drop in your content. That easy. Honestly, I love how easy it is to use Premise. In that way, it's similar to Paid Memberships Pro (except that PMP doesn't have the ability to drip content. But that's going to come soon because I'm going to pay to have it added).
Step Four: Create the Drip Schedule
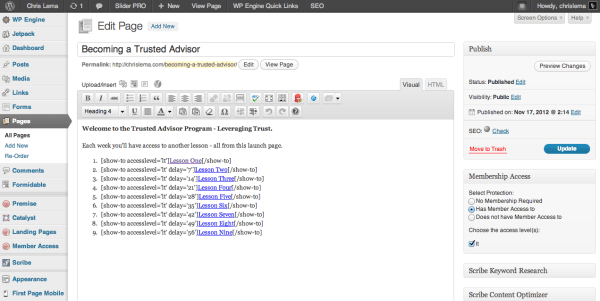
Creating a drip schedule with Premise is just as easy as everything else. The way I do it is to create a table of contents page. This page is the “home” for each class I create. You'll want to mark it for membership as well, as you don't want people to see these links unless they have access to this product.
And then you create links to all the steps (or content pages). When you do it, you want to use a short code that comes with Premise. [show-to] is the short code. And “accesslevel” is the attribute that tells it what level a person has to have to view it. And this is where you also want to add the drip component. You do it by adding one more attribute: “delay”. That's it.
Delays are counted in days from when the user entered the membership program. So, as you'll soon see, my students will get the first link right away, and then new levels every week over a three month period.
Step Five: Seeing it Work
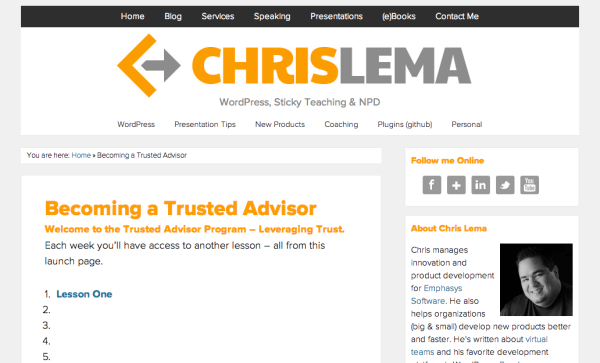
Here's an example of my Leveraging Trust program, protected from you because you don't have access. But you can see it's also protected from members who just started. All they see is the link to week one's content. Next week, they'd see week two's content.
It's really that simple.


